Have you ever wondered how to build a smart AI chatbot that can answer medical queries reliably? General-purpose Large Language Models (LLMs) are great, but they can sometimes “hallucinate” or make up information. In the medical field, accuracy is everything.
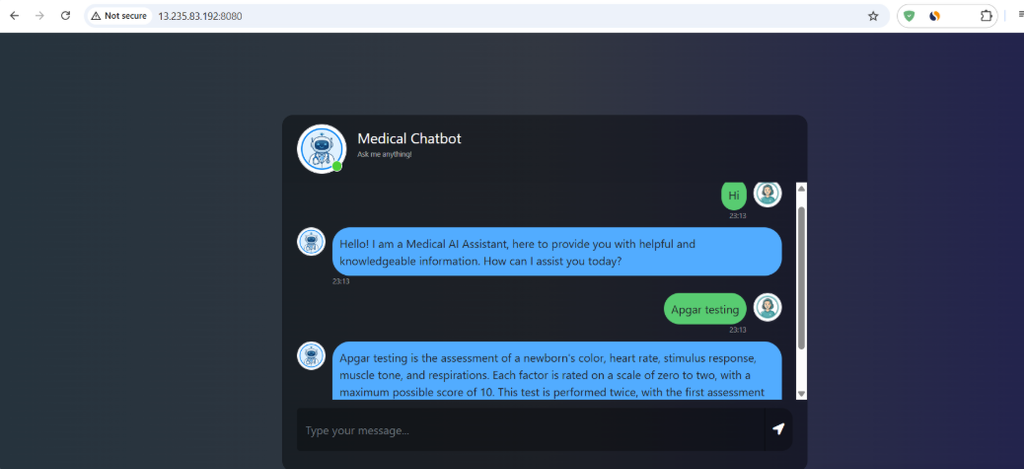
That’s where Retrieval-Augmented Generation (RAG) comes in. RAG grounds the AI’s responses in a trusted source of knowledge—like a comprehensive medical textbook.
In this article, we will walk through a Medical AI Assistant project. We’ll explore how it works, understand its code, and learn how to run it locally on your machine.
What is the Medical AI Assistant? #
The Medical AI Assistant is a web-based chatbot designed to provide accurate, context-aware answers to health and medical-related questions.
It works by combining semantic search using a vector database (Pinecone) with Google’s powerful Gemini 2.5 Flash model. When you ask a question, it searches a medical book for relevant information, and then Gemini uses that information to generate a natural, helpful response.
Technology Stack #
- Frontend: HTML5, CSS3, Bootstrap 4
- Backend: Flask (Python)
- AI Orchestration: LangChain
- Embeddings: HuggingFace (
sentence-transformers/all-MiniLM-L6-v2) - Vector Database: Pinecone
- LLM: Google Gemini 2.5 Flash
How It Works: The Architecture #
The system operates in two main phases:
1. Data Ingestion (Pre-computation) #
Before the chatbot can answer anything, it needs knowledge. We take a medical reference PDF (Medical_book.pdf), split its text into smaller, manageable chunks, and convert those chunks into mathematical vectors (embeddings) using a HuggingFace model. These vectors are then stored in a Pinecone Vector Database.
2. Query & Retrieval (Runtime) #
When a user asks a question via the web interface:
- The question is converted into a vector.
- We search Pinecone for the most similar text chunks (context).
- The retrieved context and the user’s question are combined into a custom prompt.
- Google Gemini reads this prompt and generates a helpful, grounded medical answer.
Understanding the Code #
Let’s dive into the core components of the project to see how the magic happens.
1. Ingesting Data (store_index.py) #
This script handles the heavy lifting of preparing our data.
# store_index.py (Snippet)
from src.helper import load_pdf, text_split, download_hugging_face_embeddings
from langchain_pinecone import PineconeVectorStore
from pinecone import Pinecone
import os

# 1. Load the Medical Book PDF
extracted_data = load_pdf("data/")

# 2. Split text into chunks
text_chunks = text_split(extracted_data)

# 3. Download HuggingFace Embedding Model
embeddings = download_hugging_face_embeddings()

# 4. Initialize Pinecone and Store Embeddings
pc = Pinecone(api_key=os.environ.get("PINECONE_API_KEY"))
index_name = "medical-bot" # Ensure this matches your Pinecone setup!

docsearch = PineconeVectorStore.from_texts(
    [t.page_content for t in text_chunks],
    embeddings,
    index_name=index_name
)
What this does: It reads the PDFs in the data/ folder, splits the text into chunks of 500 characters, creates semantic embeddings using a local HuggingFace model, and uploads them to Pinecone.
Important Note on Index Names: In the provided project code, store_index.py uses the index name "aiddata", while app.py expects "medical-bot". You must ensure both files use the exact same index name (e.g., change "aiddata" to "medical-bot" in store_index.py) for the app to retrieve data correctly.
2. The Smart Prompt (src/prompt.py) #
To prevent the AI from making things up, we give it strict instructions:
prompt_template = (
    "\nYou are a helpful and knowledgeable Medical AI Assistant.\n"
    "If the user is just saying hello or asking about you, greet them politely "
    "and introduce yourself as a Medical AI Assistant.\n"
    "Otherwise, use the following pieces of information to answer the user's question.\n"
    "If you don't know the answer to a medical question and the context is empty, "
    "just say that you don't know, don't try to make up an answer.\n"
    "\nContext: {context}\n"
    "Question: {question}\n"
    "\nOnly return the helpful answer below and nothing else.\n"
    "Helpful answer:\n"
)
3. The Web Application (app.py) #
This is the heart of the chatbot, linking the UI with the AI pipeline.
# app.py (Snippet)
from flask import Flask, render_template, request
from langchain_pinecone import PineconeVectorStore
from langchain_core.prompts import PromptTemplate
from langchain_google_genai import ChatGoogleGenerativeAI
from langchain_classic.chains import RetrievalQA

app = Flask(__name__)

# ... (Load embeddings and Pinecone vector store) ...

# Setup the Gemini LLM
llm = ChatGoogleGenerativeAI(
    model="gemini-2.5-flash",
    temperature=0.8,
)

PROMPT = PromptTemplate(template=prompt_template, input_variables=["context", "question"])

# Create the Retrieval QA Chain
qa = RetrievalQA.from_chain_type(
    llm=llm,
    chain_type="stuff",
    retriever=docsearch.as_retriever(search_kwargs={"k": 2}), # Get top 2 results
    return_source_documents=True,
    chain_type_kwargs={"prompt": PROMPT},
)

@app.route("/get", methods=["GET", "POST"])
def chat():
    msg = request.form["msg"]
    result = qa.invoke({"query": msg})
    return str(result["result"])
What this does: When a user submits a message to the /get endpoint, the RetrievalQA chain kicks in. It fetches the top 2 most relevant passages from Pinecone (k=2), formats them using our prompt template, and asks Gemini to generate the final response.
Prerequisites & Environment Configuration #
Create a .env file in the root directory of the project with the following configuration variables:
PINECONE_API_KEY="your-pinecone-api-key"
GOOGLE_API_KEY="your-gemini-google-api-key"
PINECONE_INDEX_NAME="your-pinecone-index-name"
Important
Make sure the index name defined under PINECONE_INDEX_NAME matches the index name you create/use inside store_index.py and app.py. By default, store_index.py references aiddata and app.py references medical-bot. To ensure successful execution, ensure these values align!
Installation & Setup Guide #
Follow these steps to set up and run the project locally:
Step 1: Clone the repository #
git clone <repository_url>
cd medical-ai-assistant
Step 2: Set up a virtual environment (Recommended) #
python -m venv venv
venv\Scripts\activate
Step 3: Install dependencies #
Install all required libraries specified in the requirements.txt file and locally link modules:
pip install -r requirements.txt
Step 4: Add your Medical Book #
Place the reference PDF document (e.g., Medical_book.pdf) in the data/ folder in the root directory.
Step 5: Ingest data into Pinecone #
Run the indexing script to parse the PDF, generate embeddings, and upload them to your Pinecone Vector Database:
python store_index.py
Step 6: Start the Flask application #
Launch the web interface locally:
python app.py
Open your browser and navigate to http://localhost:8080 (or http://127.0.0.1:8080) to interact with the Medical AI Assistant.
| Github Link | Click Here |
Join For More Updates #
| 1. Official Telegram | Click Here |
| 2. Download App | Click Here |
| 3. Download Study Routine App | Click Here |
| 4. Follow for AI Jobs | Clikc Here |
| 4. CS/IT Job Alert | Click Here |
| 5. Join For Engineering Exam Job Alerts | Click Here |
| 6. DRDO & ISRO Job Alert | Click Here |
| 7. EXAM PYQ PDF | Click Here |
| 8. Placement CS\IT | Click Here |


